Alrighty friend,
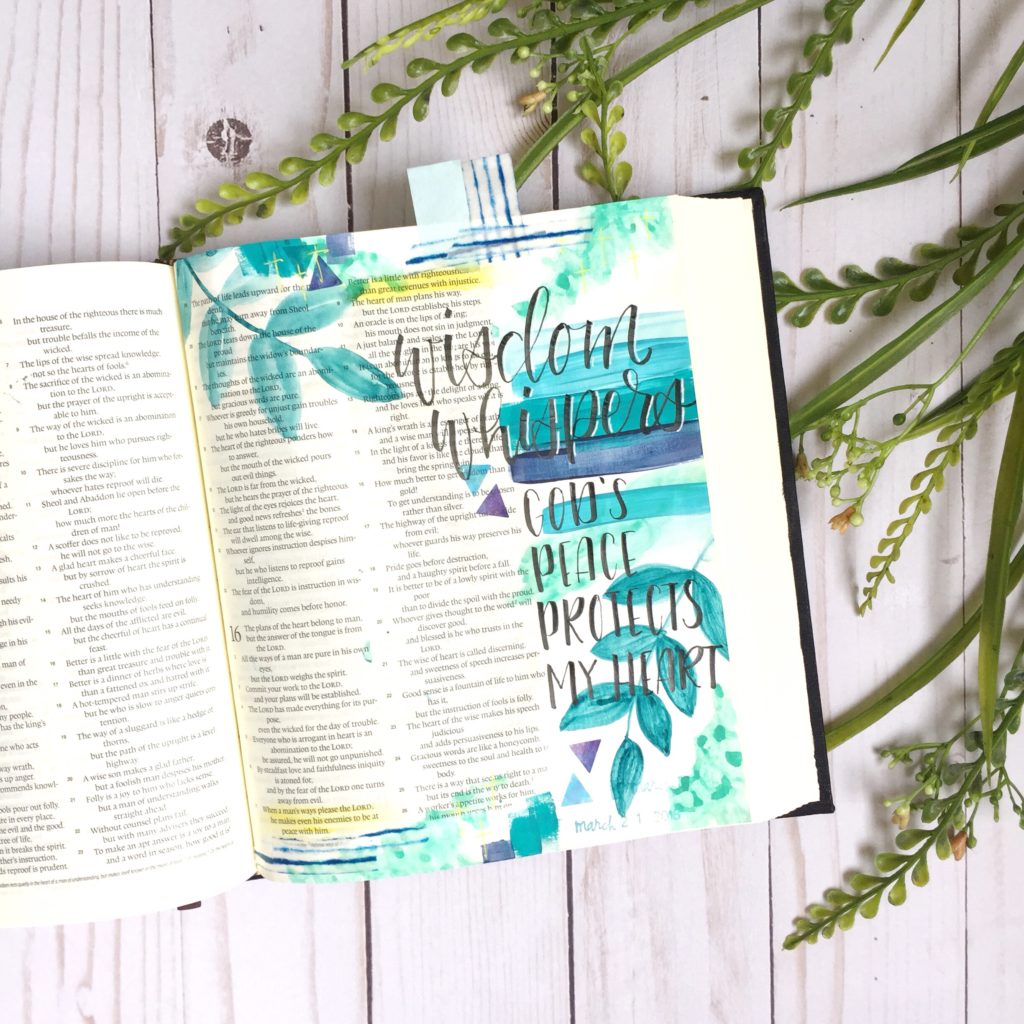
Today I am branching out into something that is slightly uncomfortable for me- MIXED MEDIA.
If you don’t know what mixed media is, it basically is just using multiple media (or supplies) to create one piece of art. You probably have dabbled with mixed media before without even knowing! For example, if you have ever added stamps along with watercolor- that is a form of mixed media!
There are so many Bible journalers who do amazing mixed media pages (some of my favorite ladies on Instagram are dotsanddust, patioponderings, psplannergirl, and colorfuljulie to name just a few) and I so admire how they can so easily combine paints and all types of other materials to make beautiful Bible pages!
But if you have been following me for a while, you’ll know that I tend to stay with my watercolors, and brush pens! There is absolutely nothing wrong with sticking with what you know, but I also think it is important to try new things now and again. And I also wanted to show you just how much you can do in your Bible journaling!

So I created a tutorial using every medium I had on hand!
I think that one of the common discouragers for us Bible journalers is that we see other peoples pages and think “wow I could never do that!” I have succumbed to this thinking many times myself! But we need to remember that Bible Journaling comes in all kinds of forms!
I am always so impressed and amazed when I see beautiful mixed media and scrapbook-style Bible pages- and feel like I can’t do that nearly as well. BUT, I have also gotten messages from those same ladies saying they love my watercolor or acrylic pages and wish they “had my talent”! I guess my point is- if you feel that you can’t do one style (whether that is watercolors and acrylics, or mixed media, or scrapbook-style, or stamping) you may find that you groove with a different style!
So, my encouragement of the day for you is to try something new, even if you think you won’t like it (remember, two years ago, I had used watercolors once in my life- for an elementary class! So it’s possible!) And allow yourself some time to practice!

Okay! Enough chatter Jenna.
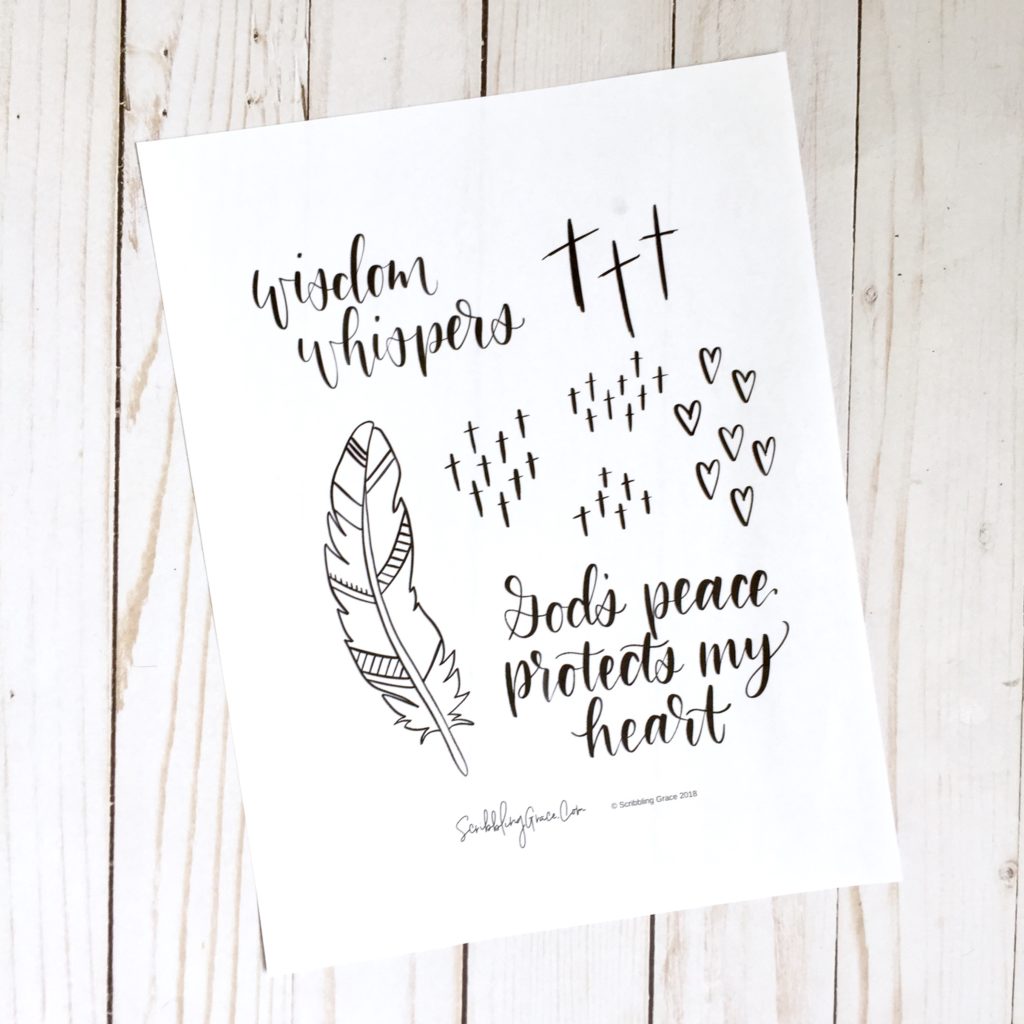
I have a free printable for you guys with some simple elements and lettering based the Wisdom Whispers Bible study I used to inspire this page. I talk more about the study in the video, but it is a great free study about the life of King Solomon created by Living By Design Ministries- I am a part of their creative team! You can sign-up at any time HERE.
You can use this printable as a traceable, or can print it out on sticker paper and stick it in your Bible! Get the printable by clicking HERE or on the image below!
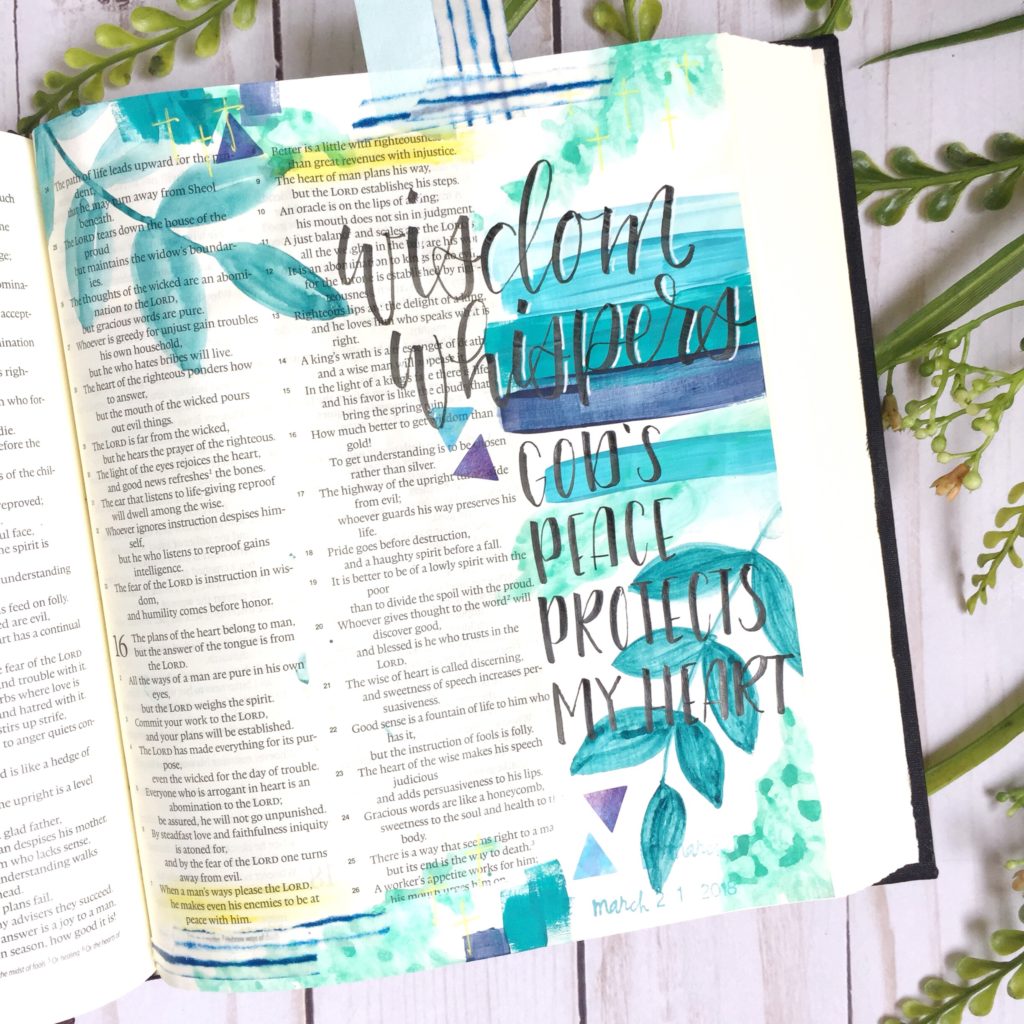
I will put the tutorial video below, but just for kicks, I will also list out the steps I used to make this page. Of course, this tutorial is really just to get your creative juices flowing! Maybe you only like one element from this tutorial (like the watercolor leaves, the acrylic lines, or the stickers) take that Idea and make it your own! Remember to have fun.
Scroll down for a list of all the supplies I used with links.
Apply a thin layer of white acrylic paint
First I applied a layer of white acrylic paint over the margins of my page. This protects my page from any mediums bleeding through the page (I was mainly worried about the date stamp I knew I would be using), and I also wanted white popping up here and there in my page and I figured it was easier to just put a layer down first.
If you have ever tried to prep your page with gesso before using watercolor, acrylic paint works basically the same way. The benefit is that it protects the page, but it does make the watercolor react differently than it would an up-prepped page. -It tends to puddle and dry unevenly- which can create a cool effect, but not everyone will like it 🙂
I then used a flat brush to apply horizontal lines of various blue acrylic paints- I just use Apple Barrel paints from Walmart for Bible journaling.
Add watercolor
Next, I dug out my watercolor paints (I use Kurretake Gansai Tambi Watercolors). I decided to do some leaves because they’re my fave. Then I just added some blotches around my page by quickly dabbing my brush randomly in spots- this added another layer of color and some more character to my page.
Again, where my watercolor sits on top of the acrylic it tends to pool up in places. I could have gone back over it in the middle of drying to get rid of the pools of paint but decided to leave the pools because it creates a fun texture.
Add washi tape and stickers
I kept these elements pretty minimal. Just using washi tape to create a little tab on my page and a few pieces on the bottom of my page to tie it together. I also added some little triangle stickers I’ve had forever just for fun.
Add gelato highlight
Gelatos are really common in the Bible journaling world. They are similar to crayons or oil pastels in texture but are water soluble and safe to use in your Bible. There are a bunch of different ways to use them (Rebecka R Jones has great gelato tutorials here) but I decided just to keep it simple and gently color over my focus verse and then used my finger to blend it in.
Add lettering
You know I love me some big brush pen lettering! So for this page, I used some of the free printable I created! I decided just to trace the “wisdom whispers” and then freehand the rest of my lettering for this page. But you could also print it out on sticker paper and stick it onto the page! Easy peasy! To learn more about how I do brush lettering (and a free practice sheet) click here.
After doing the brush lettering with my Tombow Fudenosuke brush pen, I added a little highlight to the right side of my letters using a white Unibal Signo gel pen.
Date stamp it
I have always been terrrrrible at adding the date to my Bible pages, but I am trying to get better, so I purchased a date stamp and used that as the last little element to my page. I used a blue dye ink pad that I had on me; but I want to point out that I do not recommend using dye-based ink since it bleeds through an unprepared page (I recommend a pigment ink); however since I had put that layer of acrylic paint down, that stopped the ink from bleeding and you can only see a little ghosting or shadow.
I know it sounds like a lot, but I actually was able to do this page in just 18 minutes!
Materials Used and Helpful Links
*This article contains affiliate links. CLICK HERE for my full disclosure*
ESV Crossway Double Column Journaling Bible -I sell these Bibles with hand-painted covers at my Etsy Shop
Apple Barrel Acrylic Paints
Kuretake Gansai Tambi Watercolors
Various generic paintbrushes from the cheap packs at the department or craft store
Faber Castell Gelatos- Brights
Washi tape and stickers- you can get these at any craft store
Date Stamp – and I recommend using a pigment ink pad like this one
——–

