Hi there,
This post has been widely anticipated and I am so glad to finally be bringing you another lettering tutorial! Specifically, this post is on doing bounce lettering, but the easy way, like I do it!
I get asked pretty much daily how you can letter specifically like I do. The truth is that we all have our own style, and no matter how hard you try, yours probably won’t look exactly like mine… AND THAT IS WONDERFUL! Your style could end up way prettier than mine! So I want to get out there right off the bat to tell you what every new creator already knows- it truly just takes practice!

*This article contains affiliate links. CLICK HERE for my full disclosure*
Now, this tutorial is more for you if you have already checked out and started practicing with my faux calligraphy and brush pen calligraphy basics posts. If you haven’t started with those, I HIGHLY recommend checking those out and getting comfortable with those techniques first (I suggest starting with faux calligraphy to understand the concept, then moving to brush calligraphy. Once you start getting a hang of that, hop back over here to start learning ways to take your lettering up a notch.)
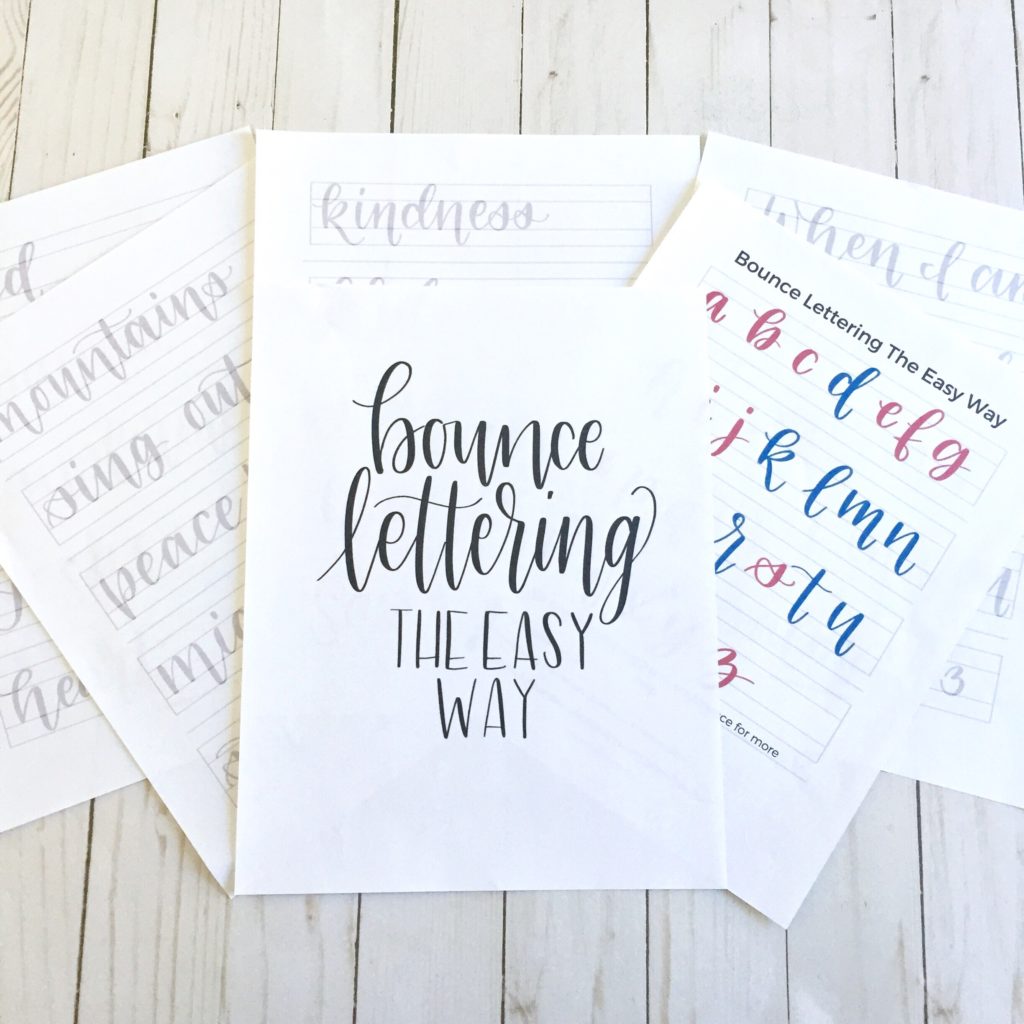
For this tutorial, I have a six-page printable for you! This printable will be a big help to understanding this “bounce lettering the easy way” technique. It has one page of my alphabet with a color code (we will talk more about that in a sec), four pages with traceable words that are commonly found in the Bible, and a blank practice page as well. I recommend printing it out once, and then using tracing paper to go over it- this is much more cost effective than printing it out over and over again :).
Get your free download by clicking here or on the image below!
This one does require you sign up for my email list, but I promise I don’t spam you. (If you are already a part of my list, you little rock star you, you should have already received the printable to your inbox.)
Alright, let’s get to lettering.
The video below shows you everything you need to know, so definitely check it out! I will also provide the cliff-notes here.
- You can do this same technique using faux calligraphy instead of a brush pen. But for this tutorial, I’m going to go ahead and show you using a brush pen.
- I use the Tombow Fudenosuke Brush Pens 98% of the time. They are easy to use for beginners and they are great for Bible journaling since they don’t bleed through the page- and they are waterproof!
- When looking at the grid on the practice sheets, each line has its own name. See image below for what I mean!
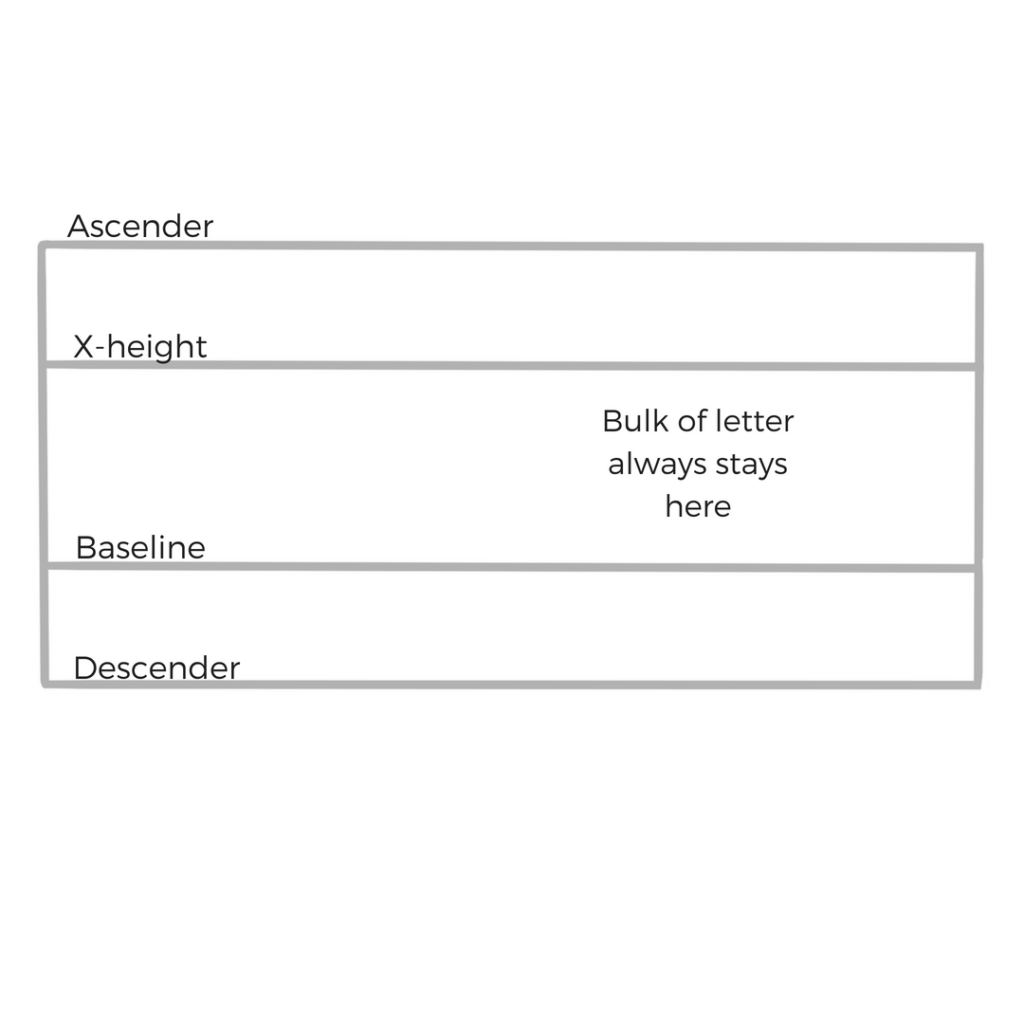
- The bulk of your letters are always going to stay between the middle two lines.
- Some letters naturally go up to the ascender line, such as a “t” or “l” or “h”; and some letters naturally go down to the descender line, such as a “y” or “g” or “j”.
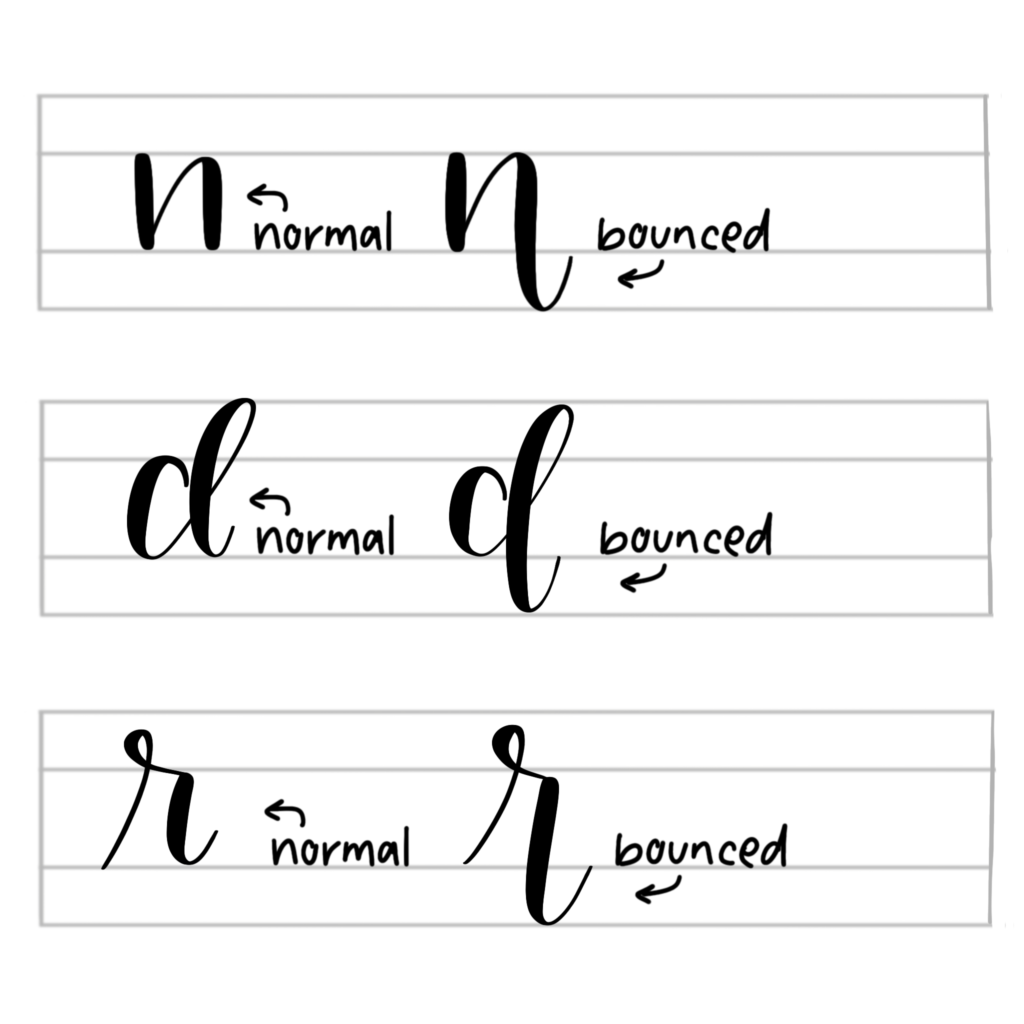
- The way that we are going to make our word look bouncy, is by taking a letter that DOES NOT naturally go down to the descender line, and making the last downstroke do so- instead of stopping at its normal spot, the baseline. See below for some examples.
- If you ever get confused on which letter to take all the way to the descender line, look at the alphabet provided in the free printable! All letters that you are going to “bounce” are in blue!
- Now, there is an exemption to this. If you ever have three or more letters right next to each other that you are going to “bounce”, you don’t have to bounce them all! This technique looks best when there is a variety of normal and bounced letters. So bounce every other letter, instead of all three (or more) in a row.
- As for the “wildcard” letters, “v” and “x”, you can leave these normal no problem; but to add a little fun to your letter, try taking the last upstroke all the way up to the ascender line (instead of stopping at the “x-height” line.)
- Lastly, one of my favorite ways to change up my lettering and add some character is to not attach the letters that I “bounce” to the rest of the word. This gives you an opportunity to add a “swoop” or even some flourishing such as loops.
Remember, this all takes some practice, but once you get a hang of it, it gets easy!
As always, HAVE FUN with your lettering. And if you are using you lettering for Bible art worship/ Bible journaling, and it doesn’t look the way you want it to, it is OKAY!- the Lord is not looking at your worship art thinking “wow, I sure did not give her that lettering talent”! He is probably thinking it is beautiful and is just overjoyed that you are spending time with him and opening yourself up to him!
I hope this tutorial helped! Be sure to download the free printable, and if you haven’t already, check out my other lettering posts HERE.
Let me know if you have questions in the comments below!
Many Blessings,
Jenna