If you have been Bible journaling for a while, you have probably heard of the “napkin technique”. It is pretty widely known in the Bible journaling online community, and for good reason! Using napkins for Bible journaling is super easy and creates such beautiful pages! It is a great technique to try if you don’t think you are a particularly “artistic” person, or don’t feel comfortable using paints and markers, but want a page that looks like it was painted/drawn/etc.
If you haven’t heard of the napkin technique before, the process is simple. You basically will decoupage or “glue” the top layer of a napkin onto your Bible page with clear gesso.
Check out the video below to see exactly how to do it! I created this page in less than 15 minutes, and it looks like art!
*This article contains affiliate links. CLICK HERE for my full disclosure*
Here are the steps:
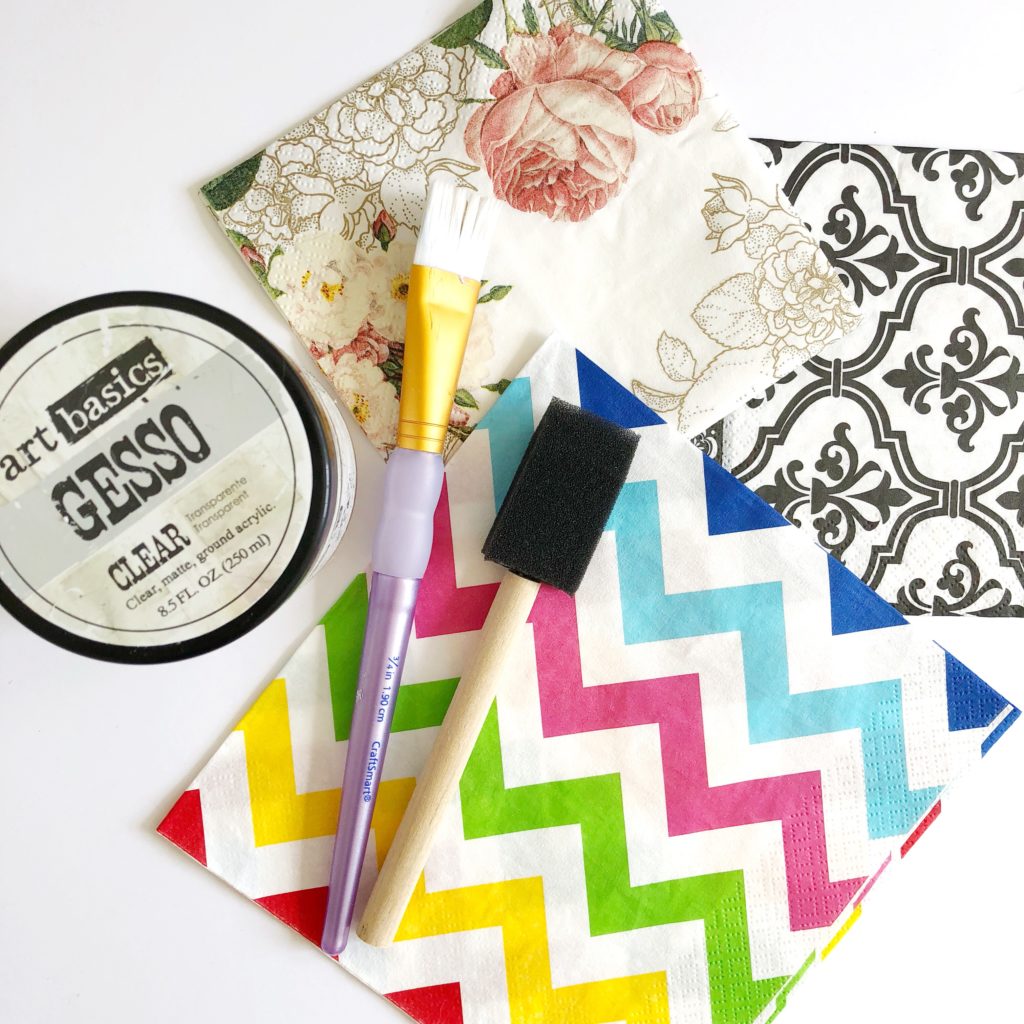
Get your supplies
Obviously, you will need a napkin. I have gotten lots of beautiful floral napkins on Amazon, but you can use any type of traditional two or three-ply napkins. Party stores are a great place to search for fun napkin designs. Though I used a floral napkin to create the page in the video, you can create beautiful pages with all types of napkins! For example, in the image below I used a chevron napkin from Walmart to create the background of my page.
You will also need clear gesso. I highly recommend this Art Basics gesso. Some gessos can leave a grittier texture, however, most are nice and smooth. You can also use ModPodge or a clear matte medium, but gesso really does work best.
You’ll also need a flat brush or a foam brush to apply the gesso, and any pens or supplies you would like to finish your page with. (I used a Tombow Fudenosuke Brush Pen to add the lettering on mine.)
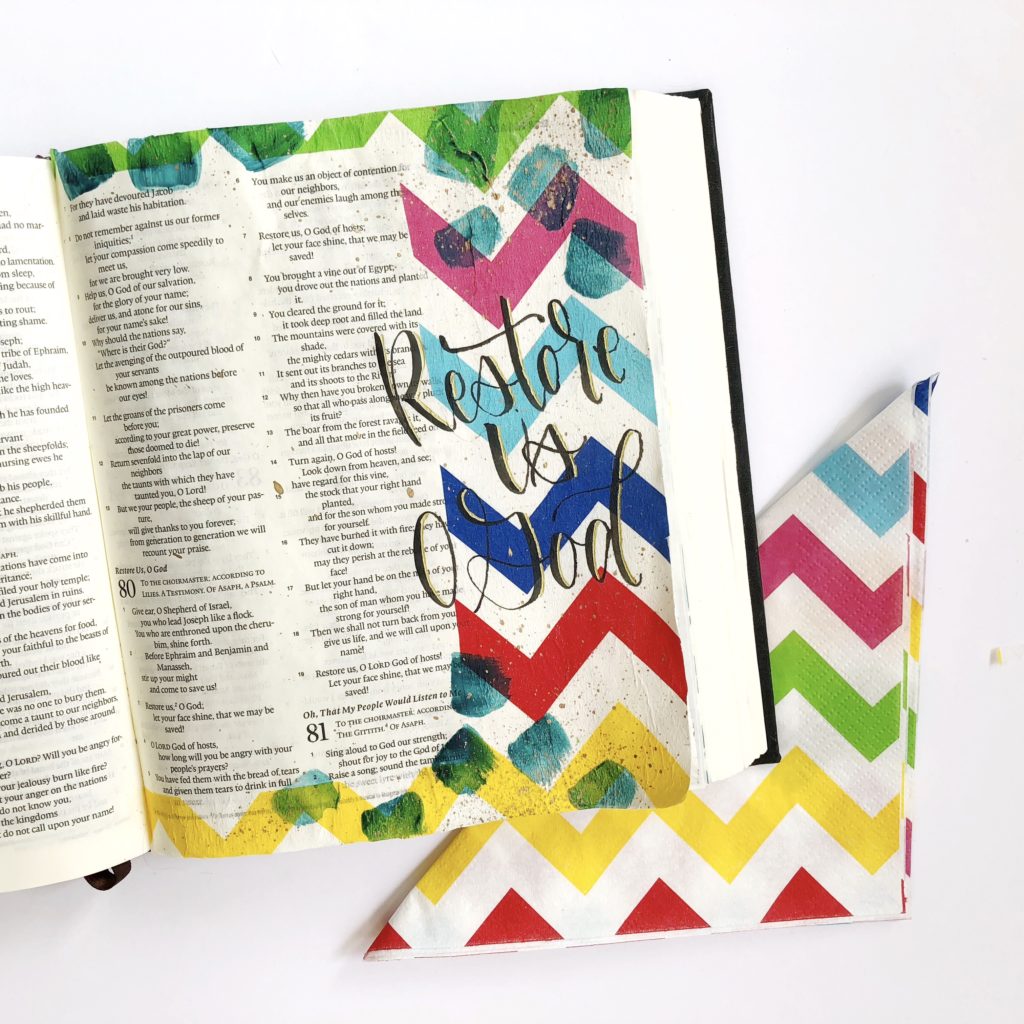
Separate the layers of your napkin
Next, a very important step is to peel apart the layers of your napkin. Most napkins are two or three-ply, which means they have two or three layers. You will want to peel off as many layers as necessary until you have just the top layer with the print left. (Simply stick a nail into one of the edges and you should see the different layers. Then, carefully pull off the layers one at a time. they usually come apart rather easily.) This technique will not work well if you try to paste the whole napkin down.
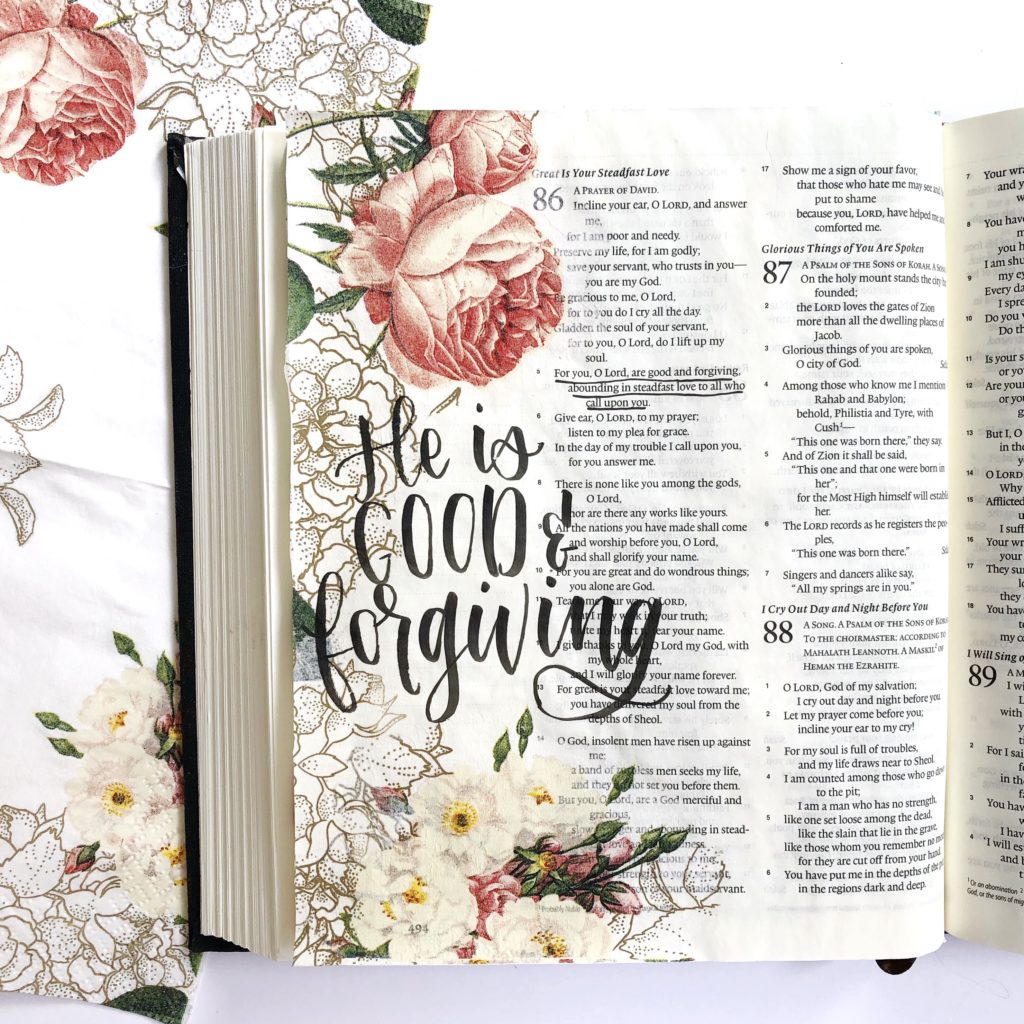
Apply the napkin
Now comes the fun part of applying the napkin. First, I always recommend putting a piece of paper underneath the page you are working on. Then, use your brush and apply a thin layer of gesso to where you want the napkin to be placed. This does not need to be perfect!
Next, place down your napkin, and then apply another thin layer of gesso on top! I recommend applying the top layer of gesso starting from the middle of the napkin and brushing toward the edges. I also like to apply gesso the rest of my page as well to make sure the thickness of the page will be even.
Finish it up
Be sure that if you painted the gesso to the edges of your page, to lift the Bible page up from the piece of paper below it it to make sure it doesn’t stick before it drys. Let it dry and that is it! You can add lettering, notes, or other mediums on top without worry.
Materials Used
*This article contains affiliate links. CLICK HERE for my full disclosure*
ESV Double Column Journaling Bible (I sell these with hand-painted covers in my ETSY SHOP!)
Napkins (some options linked below)
Flat paintbrush or foam brush
Tombow Fudenosuke Brush Pen (Link for the set of three types of Fudenosuke brush pens. I highly recommend all of them for beginner or advanced lettering!)
Other Helpful Posts
Brush Pen Calligraphy Basics– With Free Printable
Brush Calligraphy Bounce Letters-Free Printable with Email Sign-up